You are coming from our related knowledge base article (Support KB 🞂 Getting Started 🞂 Connecting Network Streamers) and you have already enabled the Network Streamers UPnP integration on your Innuos server/streamer/player. You now want to configure the Sense UPnP integration. You will be able to use the Innuos Sense app to play music to those devices instead of using the device’s native or recommended app. This enables using the Innuos Sense app as a single app to play music on both Innuos and other network streamers, maintaining a single view of your Music Library, Playlists and Streaming Services across your devices.
How to Enable the Sense UPnP integration
Please follow the configuration steps below:
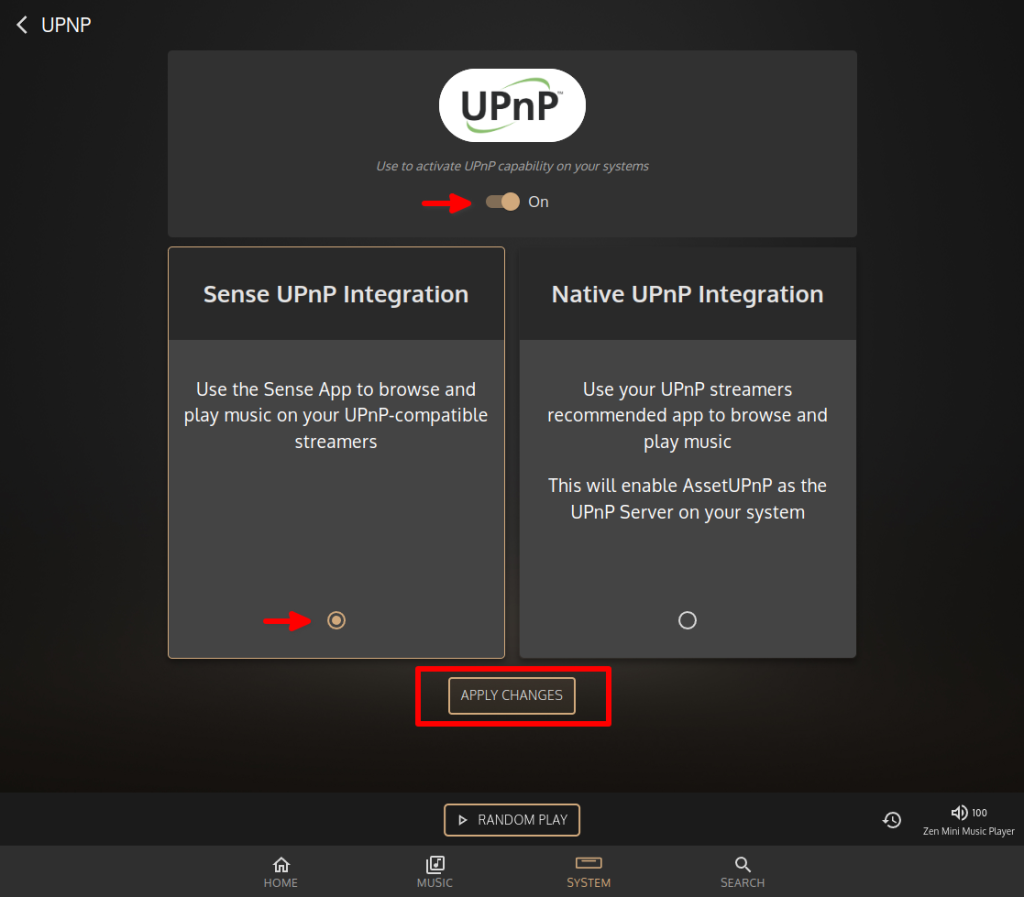
1. On the innuOS dashboard 🞂 SYSTEM 🞂 SETTINGS 🞂 INTEGRATIONS 🞂 UPnP page select the Sense UPnP Integration and APPLY CHANGES;
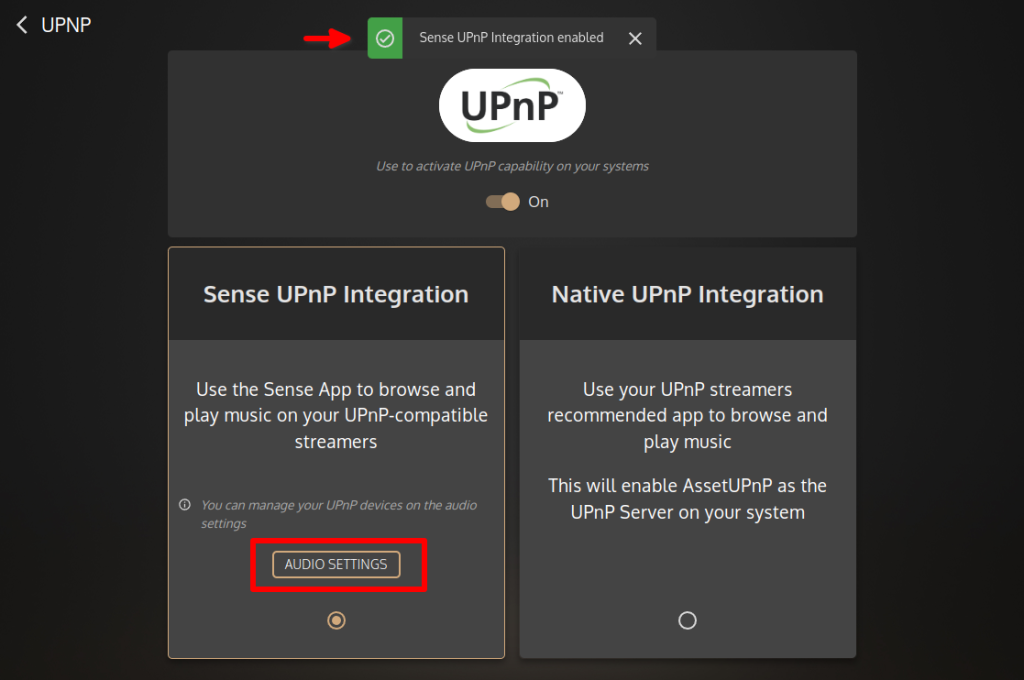
2. You should get a pop up notification indicating that the Sense UPnP integration was successfully enabled. Press/click the AUDIO SETTINGS button to find and configure any available Network Streamer player.
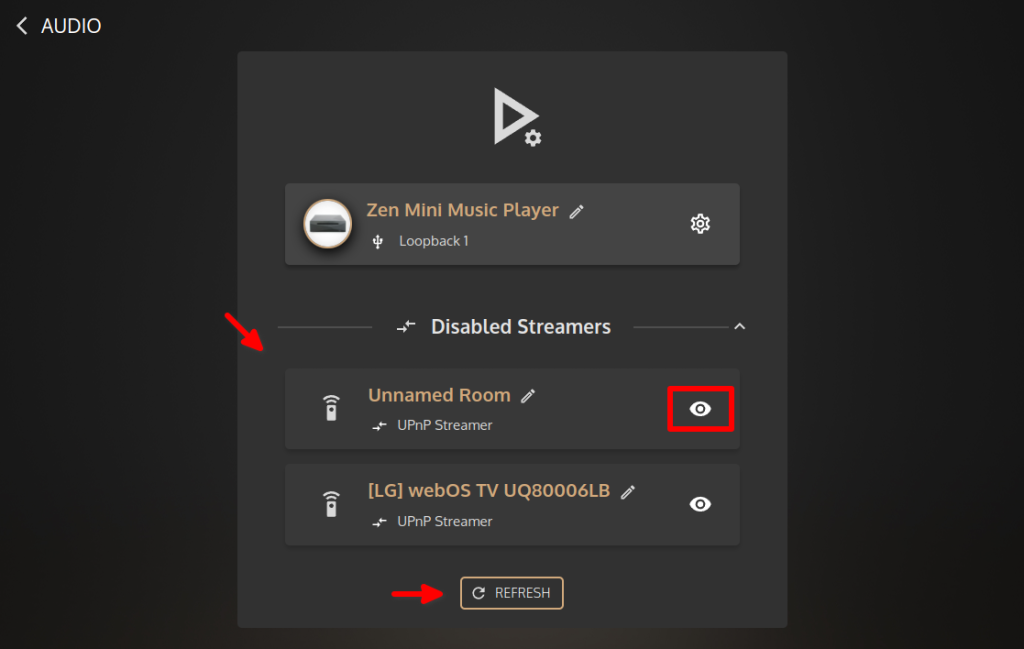
3. On the AUDIO SETTINGS page, allow some time so that the innuOS system is able to scan and find any new Network Streamer devices available on the network. After about 30 seconds, it should display a list of any available enabled and disabled Network Streamer players. In case none are displayed for more than 30 seconds then press/click REFRESH to scan the network and again wait about 30 seconds. On the resulting found Network Streamers choose the player you want to enable and press/click on the respective rightmost icon (eye) to enable it;
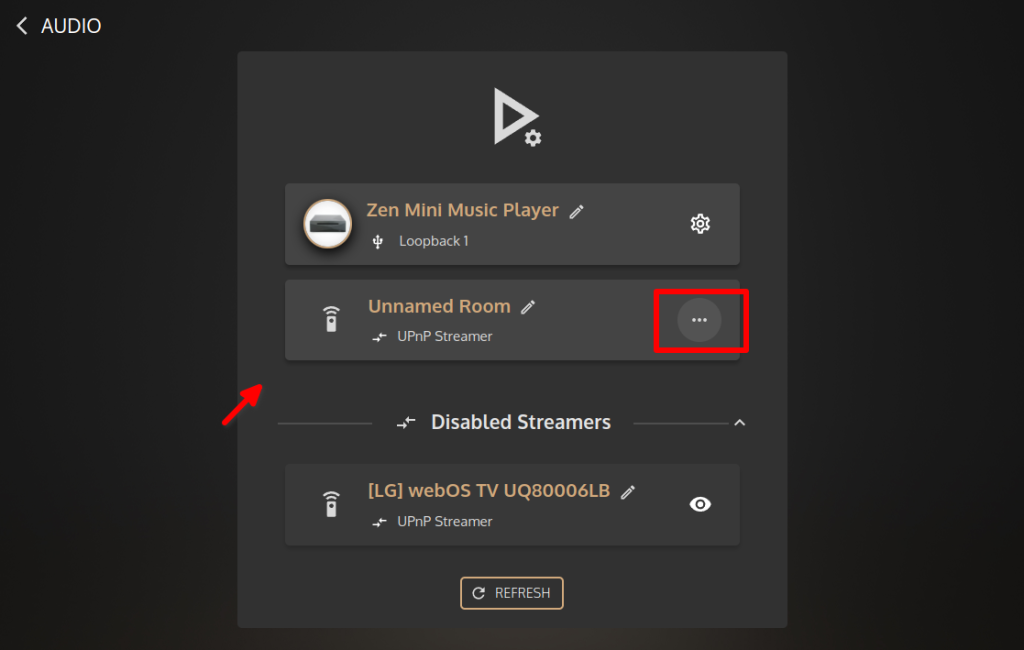
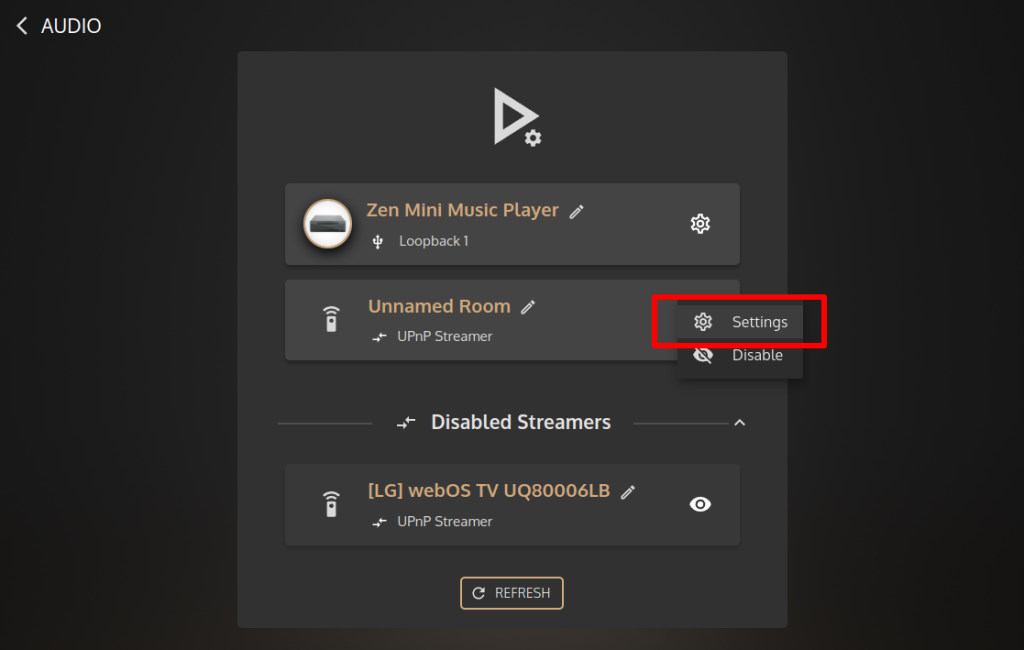
5. The enabled player(s) will be moved to top – the enabled Audio Players list above the Disabled Streamers list (below). Now let’s configure the enabled player – press/click on the respective rightmost menu icon (⋯).
6. A menu with a couple options will open. You may disable that player at any time or you may configure its settings. Press/click ⚙ Settings to choose an appropriate UPnP profile for that player;
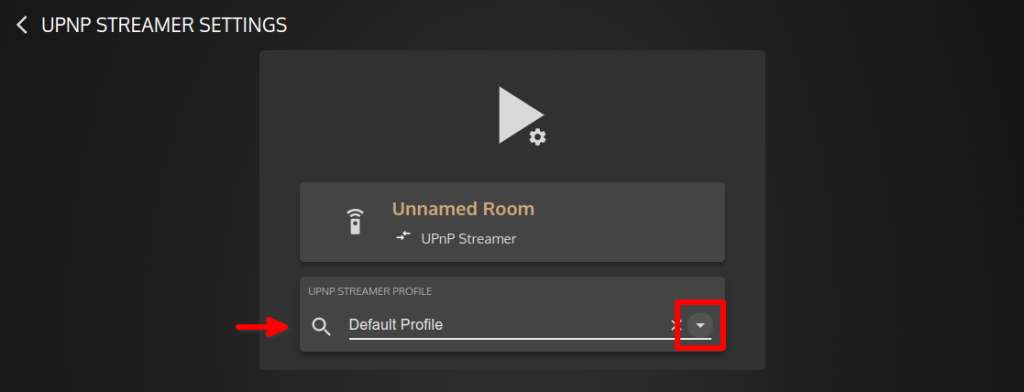
7. By default the Default UPnP player profile is applied. Press/click the rightmost list icon (⏷) to select any of the available UPnP profiles for your Network Streamer. If your make and model is available then try it first. In this example case we will set a player for a Sonos speaker (which also works as a Network Streamer);
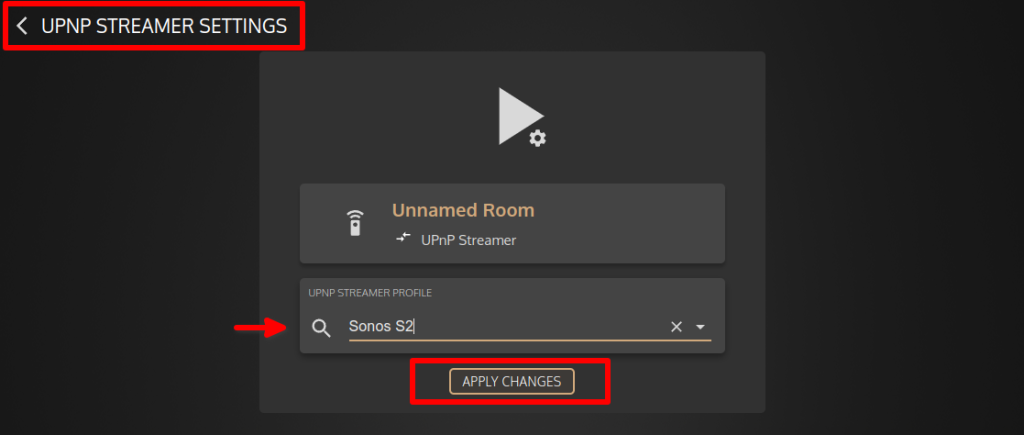
8. Select the desired UPnP profile and press/click APPLY CHANGES. In this case it is the Sonos S2 UPnP profile. When applied please go back to the previous page by pressing/click the top left navigation button < UPNP STREAMER SETTINGS.
9. Back to the Audio Players settings page. Now let’s rename that player to a more friendly name. Press/click the respective pencil icon (🖉) to edit that player name;
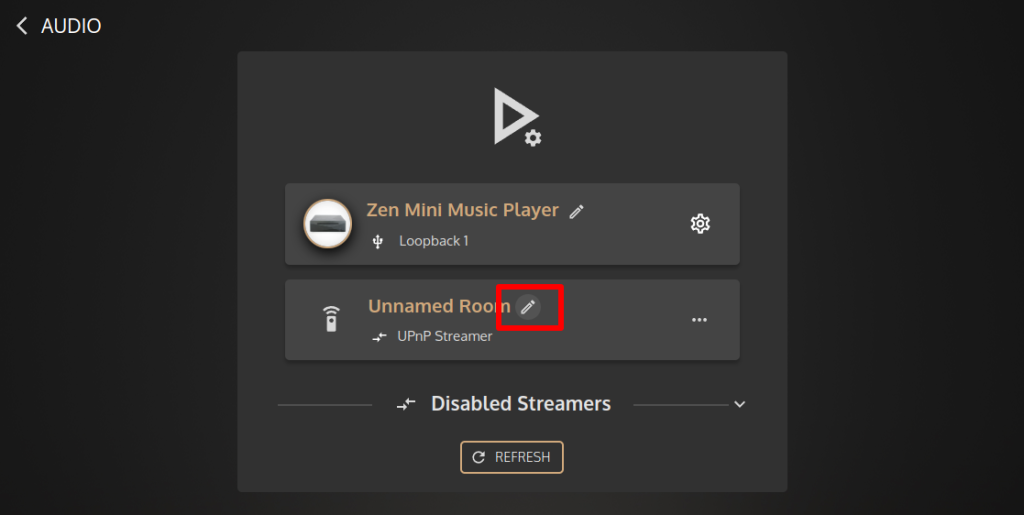
10. In this example case we will name it “Office Sonos” as the Sonos speaker located in the office. Press/click the checkmark icon (✓) to apply it. Once applied it will show the enabled player properly renamed. It is now available as an additional player to be selected to playback to. You may now press/click on the volume control icon to select that player and also control its volume;
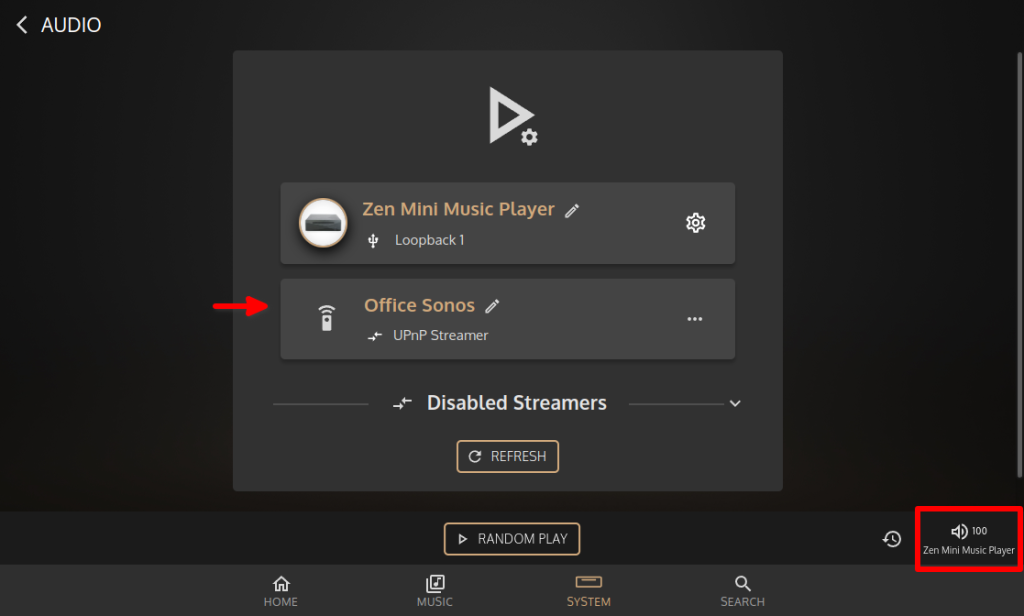
11. Once the player is configured, it will show up on the available players list (by the volume control), which you can access on the bottom-right corner of the innuOS dashboard. Press/click on it and choose the desired player and/or change its volume level setting. Press/click CLOSE to return.
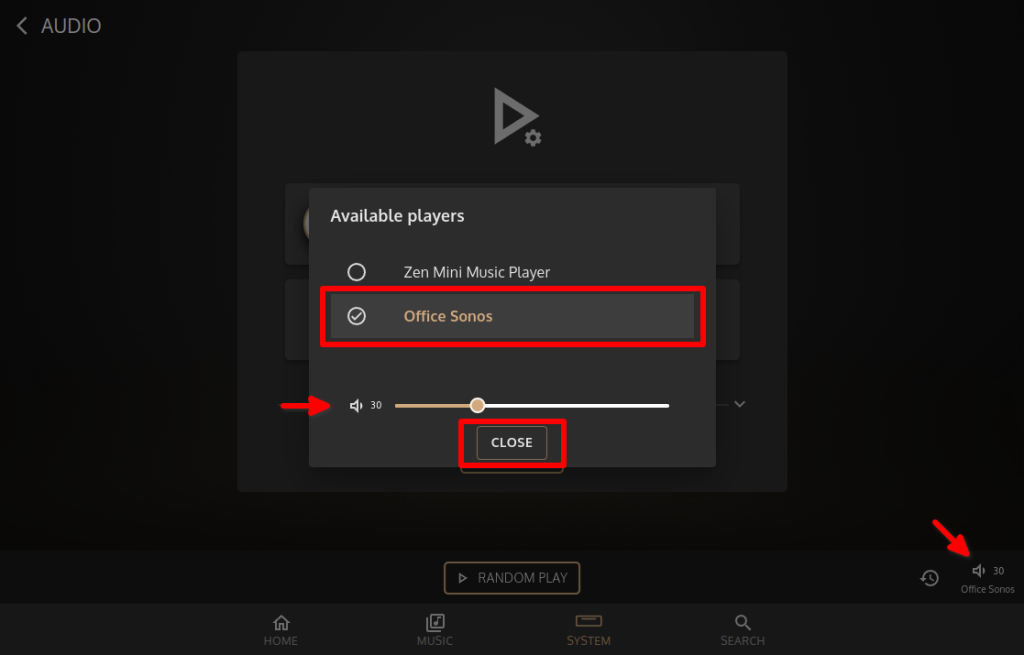
12. While the respective Network Streamer UPnP player is selected you may now play anything from your Music Library, your Streaming services or online Radio streams to it. If for some reason the selected UPnP profile doesn’t work well or not at all with your Network Steamer then you may want to try the “Default” profile or any other available profiles and check if they work well with it. In that case please go back to step (7.) above and choose the desired profile and try again.
Done. You should now be able to play easily from your Innuos server/streamer/player to your Network Streamer with the Innuos Sense app.

