This article will show you how to add an external M.2 SSD to expand the storage capacity of your Stream 1/3 or ZEN/ZENith Next-Gen.
Installing an M.2 Drive in to the External Storage Bay
1. Make sure your system is fully shut down:
- From a powered-on state, put the system into standby either from the shut down command from the Sense app or pressing the button under the front fascia.
- Press the rear mains switch to the ‘O’ position.
- Disconnect the mains power cable.
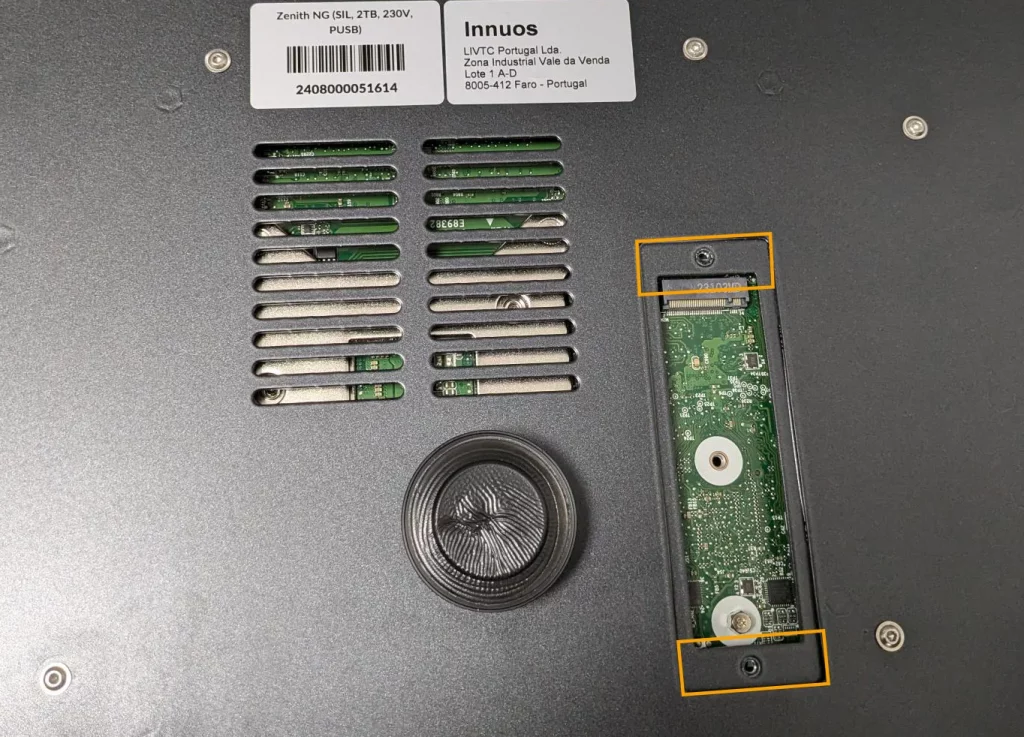
2. Move your system to a flat and soft surface and place the it upside-down to reach the M.2 bay on the underside of the system.
3. Use a 2mm hex or ‘allen’ key to remove the two screws holding the M2 backplate in place.
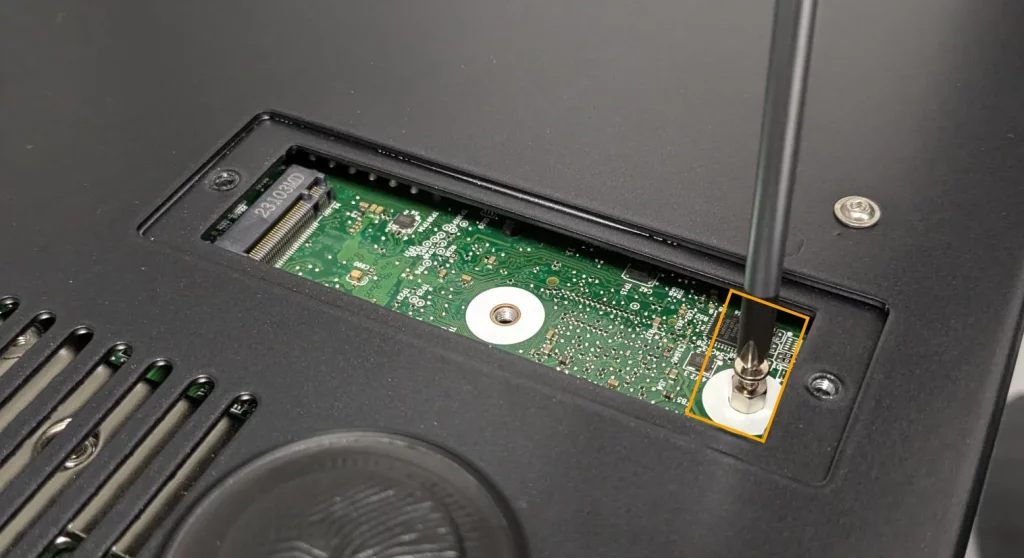
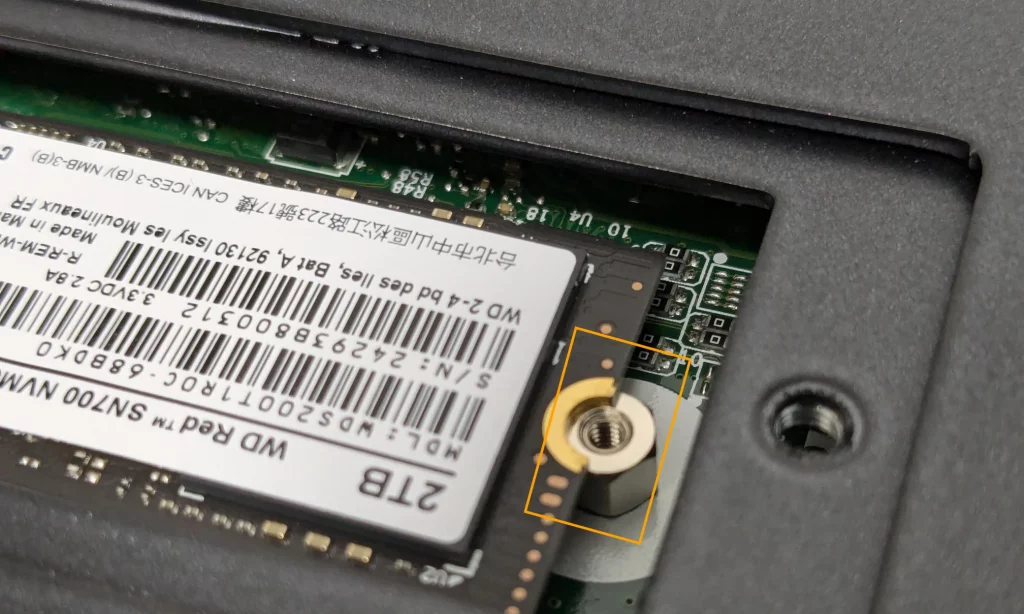
4. Using a narrow crosshead screwdriver, remove the screw from the standoff mount as pictured below.
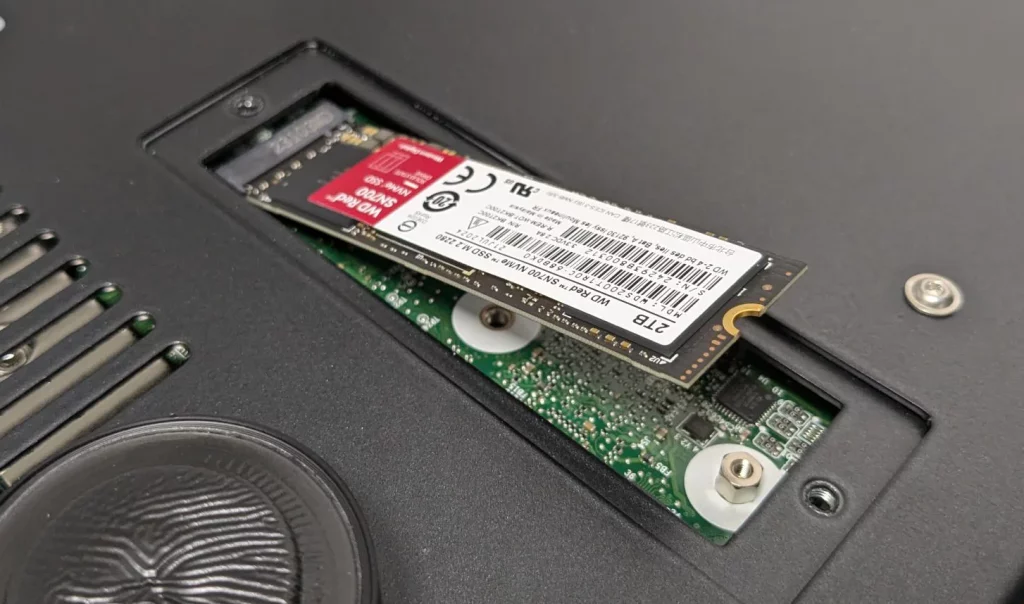
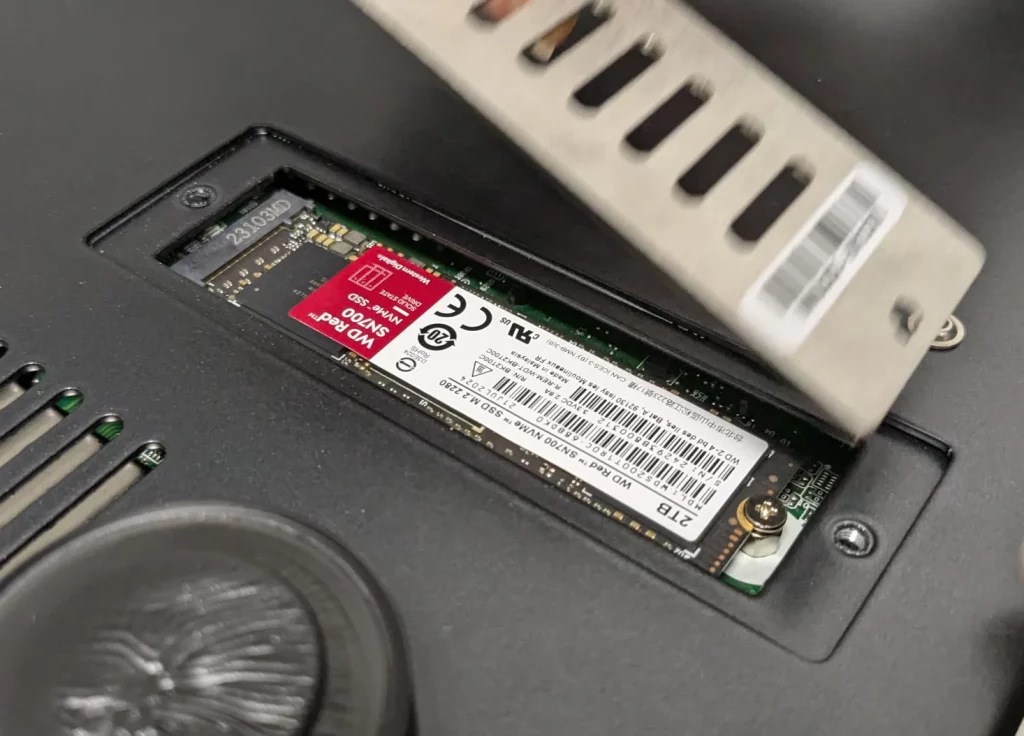
5. Insert your M.2 SSD, then re-insert and tighten the holding screw.
6. Place the backplate back on and tighten the two 2mm screws.
7. Return your system to your HiFi and reconnect all your cables.
8. Press the rear mains switch back to the ‘I’ position.
9. Press the standby button under the front fascia to boot the system up.
10. Open the Innuos Sense app (or use my.innuos.com on a PC) and select your system.
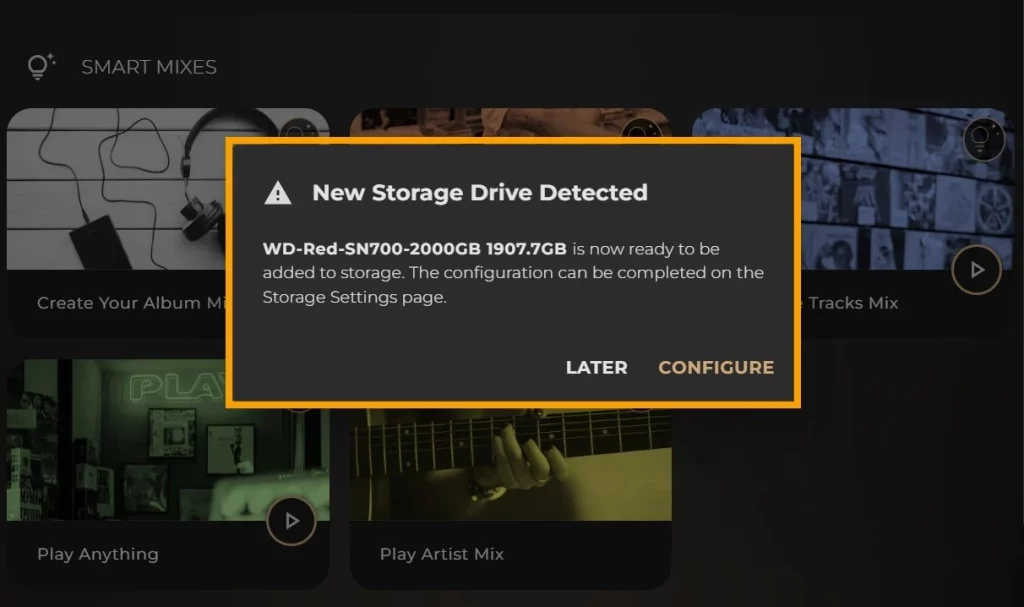
11. You will automatically be presented with a system notification that a new storage drive has been detected. Select ‘Configure’
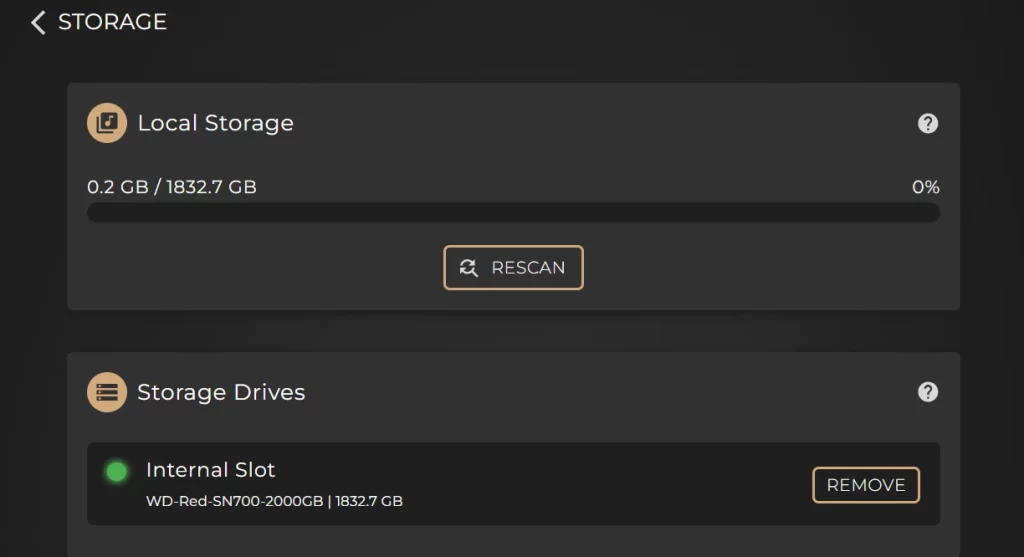
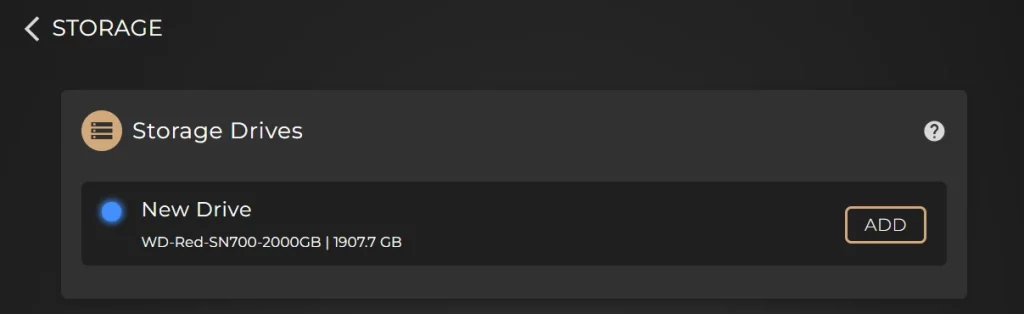
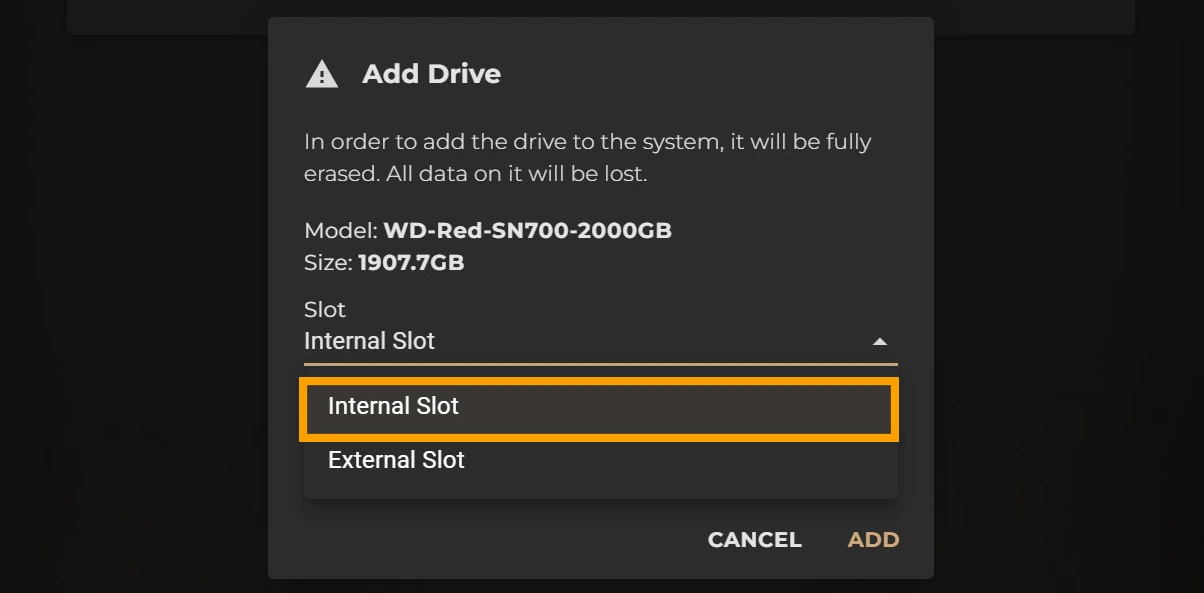
12. This will bring you to the STORAGE page within SETTINGS, where your ‘New Drive’ will be listed with the model number and drive capacity. Select ‘ADD’
13. On the next screen, make sure ‘External Slot’ option is selected, and type in ERASE to confirm the formatting process to add your drive. The “internal slot” option will not be visible if you have a ZEN/ZENith Next Gen that does not already have an integrated SSD fitted. On Stream 1/3 you can only add the one external m.2 ssd.
14. The system will take a few moments to prepare your drive, after which you will be prompted to Restart the system to finish the process.

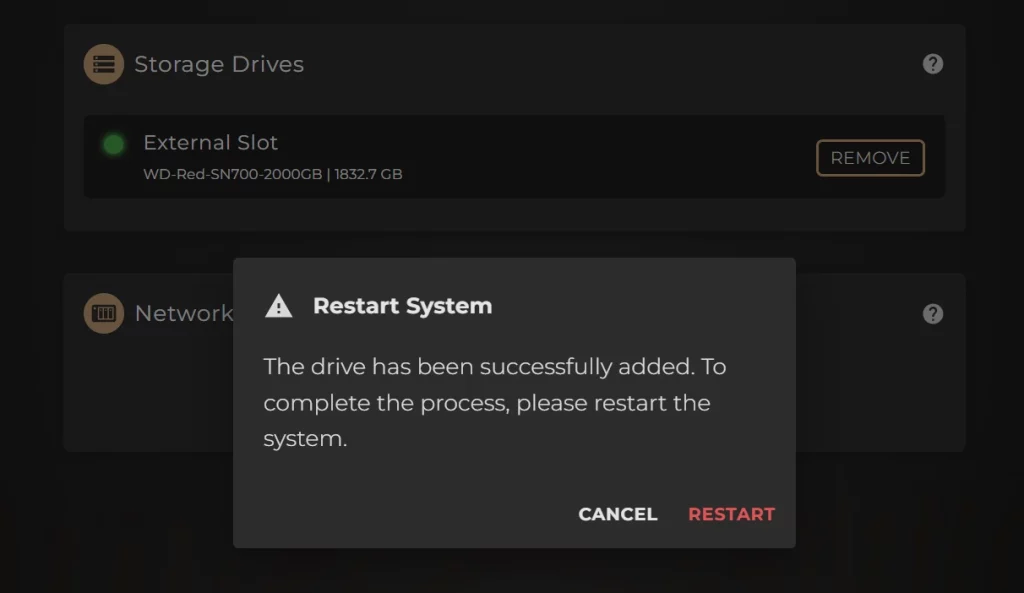
15. Restart the system. You are now ready to begin importing music in to your M.2 drive!