

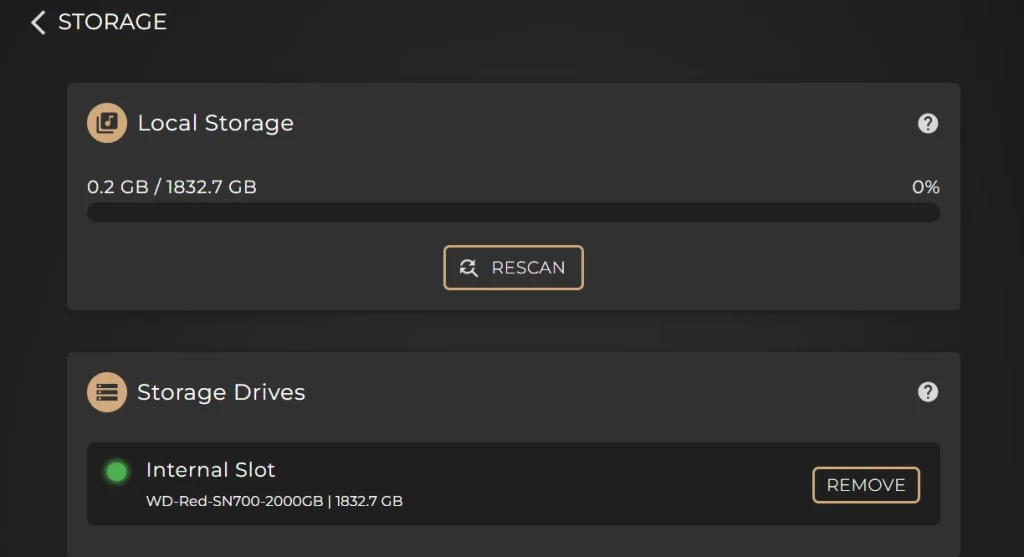
1. Open the Innuos Sense app and go to SYSTEM -> SETTINGS -> STORAGE.
2. Your drive will be listed with a green light within the Storage Drive section. Select the REMOVE button located beside your listed drive.
3. The following screen will ask for you to confirm the removal of the drive by typing REMOVE into the box, then selecting the REMOVE button.
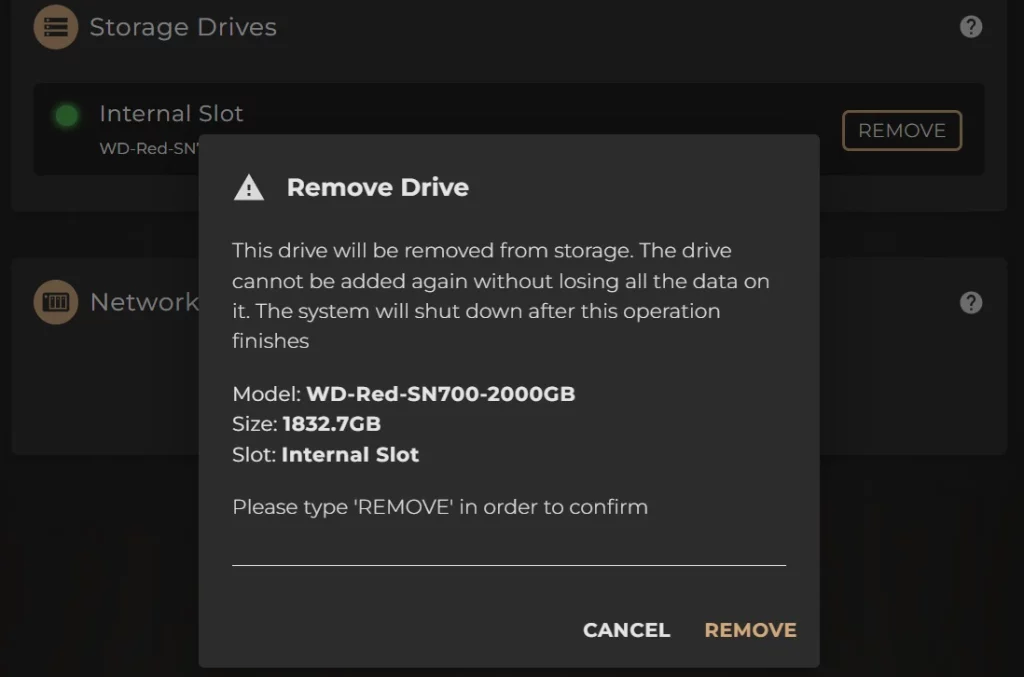
4. The system will then automatically shut itself down to complete the process and allow you to begin physical removal of the M.2 drive.
5. Repeat steps 1 – 4 from the previous ‘How to Install an M.2 SSD into the External Storage Bay’ article to safely power down and disconnect your system, then access the external M.2 storage bay.
6. Withdraw your M.2 SSD module. You may install a new M.2 drive now if you are swapping out drives.
Make sure to re-insert and tighten the screw back into the offset mount.
7. Repeats steps 7 – 9 from the previous ‘How to Install an M.2 SSD into the External Storage Bay’ article to reconnect and power your system on again.