Innuos servers/streamers make it very easy to import your current Music files/folders currently stored on your computer. There are two ways you can import music from your computer to your music server:
- Import using the Auto-Import shared folder;
- Copy your music directly to the Music shared folder;
- Import using an USB storage drive as transfer medium;
The Auto-Import shared folder is our recommended method of importing with 3 important features:
- The Auto-Import folder is a shared folder on the music server that allows to work as a “shopping basket”. This means that you can add files or folders from your computer to the Auto-Import folder and they will not be imported right away into the music library. You can keep adding files and folders until all the music you want to import is there. Once you are happy with the files and folders to import, you can access the Innuos Sense app and use the Import > Auto-Import feature. This will copy all the files from the Auto-Import folder to a newly created folder under the Music shared folder, which will then be automatically added to the Music Library.
- This method allows you to revert an import you have done, deleting all files from an import. This is useful if you are just trying the music and not sure yet you want to add them permanently to your music library.
- This method allows you to import all music within a zip or tar file. This is very useful when downloading music from music services as they generally with download in a zip compressed format. Placing the zip on the shared folder and using Auto-Import will automatically decompress the file and place its files inside the designated folder.
In addition to the Auto-Import shared folder, you can also copy your music directly to the Music shared folder. When using this method, you can create the folders manually within the Music folder and copy your music directly. This music will be automatically added to the Music Library as it’s being copied. The main advantage of using this method is allowing you to create the folder structure you want under Music and place the music exactly where you want. It’s especially important if you browse your library using your Folder structure.
Alternatively, if for some reason a network transfer/copy is not feasible, is not working for you or it takes too much time on your current network environment you may also consider using any USB storage drive (large enough for your Music folders/files) as a transfer medium.
Importing Music with the Auto-Import method
1. Firstly locate any source Music folder(s)/file(s) currently stored on your computer. Open your server’s Auto-Import network shared folder with your computer’s file browser. You may then use your computer’s file browser to copy/paste or drag the desired source Music folder folder(s)/file(s) to the Auto-Import folder. Allow the transfer to complete successfully.
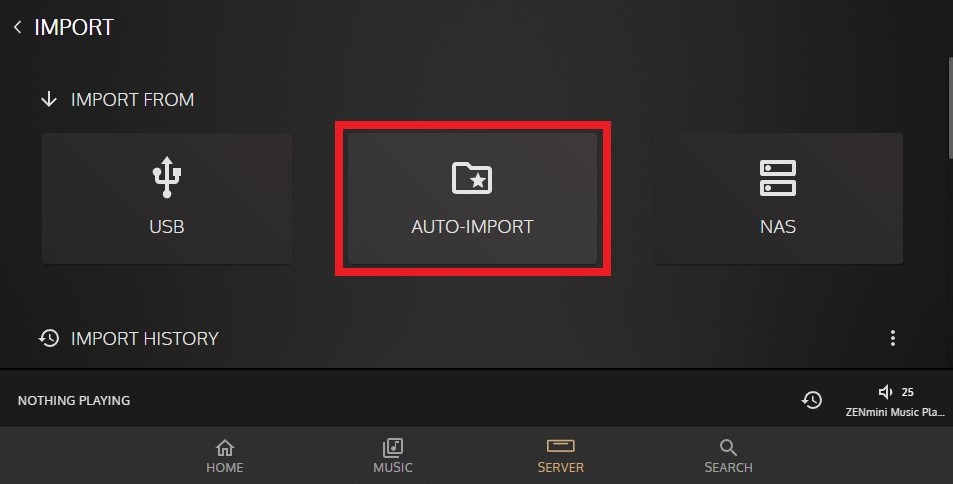
2. With the Music folders/files copied to the Auto-Import folder you may now proceed with the import process. Simply go to the innuOS dashboard via my.innuos.com or the Innuos Sense app > SERVER > IMPORT > AUTO-IMPORT. Select AUTO-IMPORT as the source to import from;
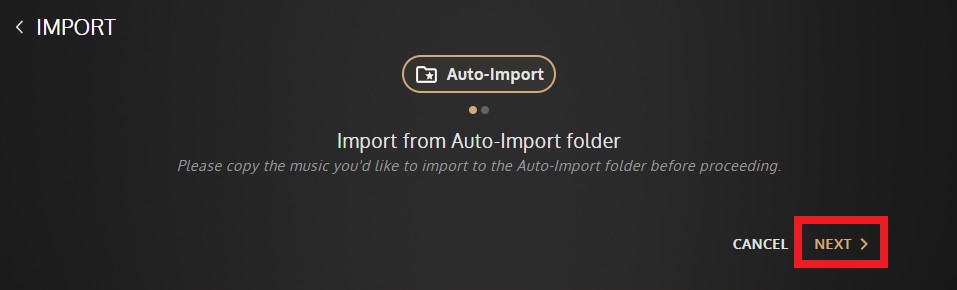
3. If you have completed the transfer on step (1.) above then you may proceed to click the NEXT button;
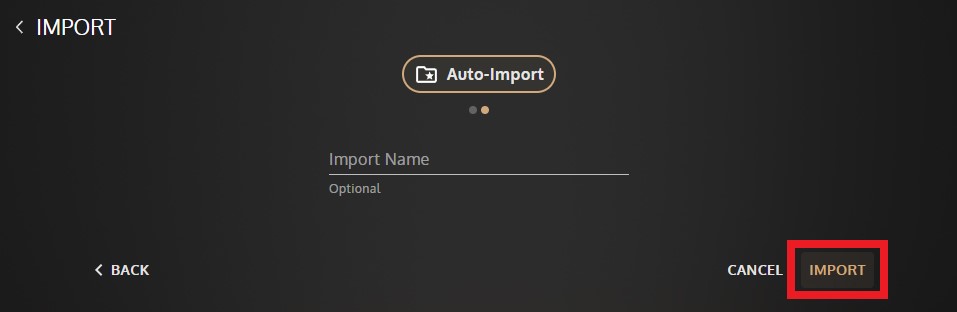
4. Optional: give your Import a friendly name. This will name the folder onto which your files will be copied. If left blank it will get an automatic folder name. Click the IMPORT button to proceed;
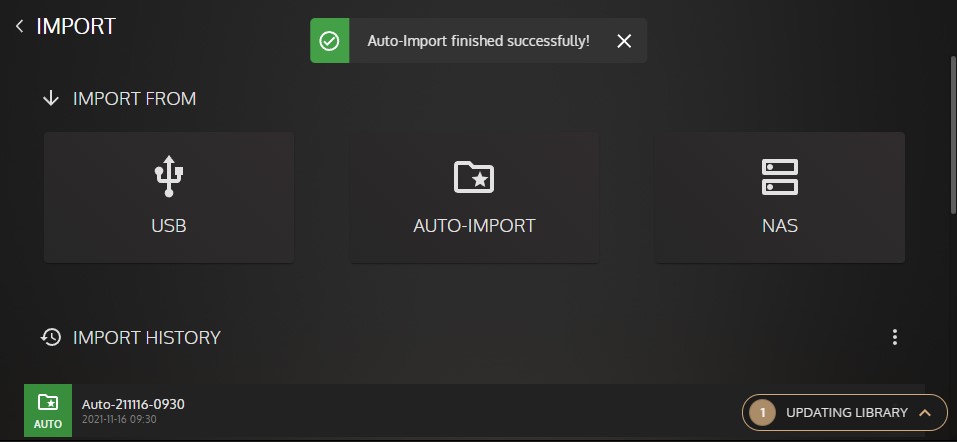
5. The import of all Music folders/files copied to the Auto-Import folder will follow. When finished successfully you should receive a success notification onscreen (as pictured). The Music Library will be automatically updated accordingly. Also notice that a new related Import History list entry will appear below – you may later use it if you desire to delete that specific import of music files/folders and easily revert to the Music Library without them;
Done! The import is now finished and the music was added to your Music Library automatically.
Importing Music by copying directly to the Music Folder
This method is quite simple. Simply access the Music Shared folder as explained in this article. Then you can create whichever folders you wish and just copy the music from your computer to the target folder. As the music is copied, you can check the Innuos Sense UI and check the New Music widget on Home is starting to show the music being added. You can browse and play the music being imported without having to wait for the import to finish.
Importing Music using an USB storage drive as transfer medium
You may also consider using any USB storage drive (large enough for your Music folders/files) as a transfer medium. For slow network environments and for fast USB 3.0 storage drives with larger Music Libraries this method may prove to be much quicker than the other alternatives. Simply use any compatible USB storage drive, firstly connect the USB storage drive to your computer and copy the desired Music folders/files from your computer to it. Then take the USB storage drive and connect it to the USB 3.0 port on your Innuos server and proceed to import from it. Please read more about it on our dedicated Support KB knowledge base article “Importing Music from an USB Drive“.