This guide will show you the simple process of using an external USB optical drive for CD ripping on to Stream 1/3 and ZEN/ZENith Next-Gen.
Step 1. Connect your external CD ripper by USB to any available USB port on your Next-Gen, such as the ‘Aux’ USB port, and connect the power connection if supplied/required by the supplier of your optical drive.
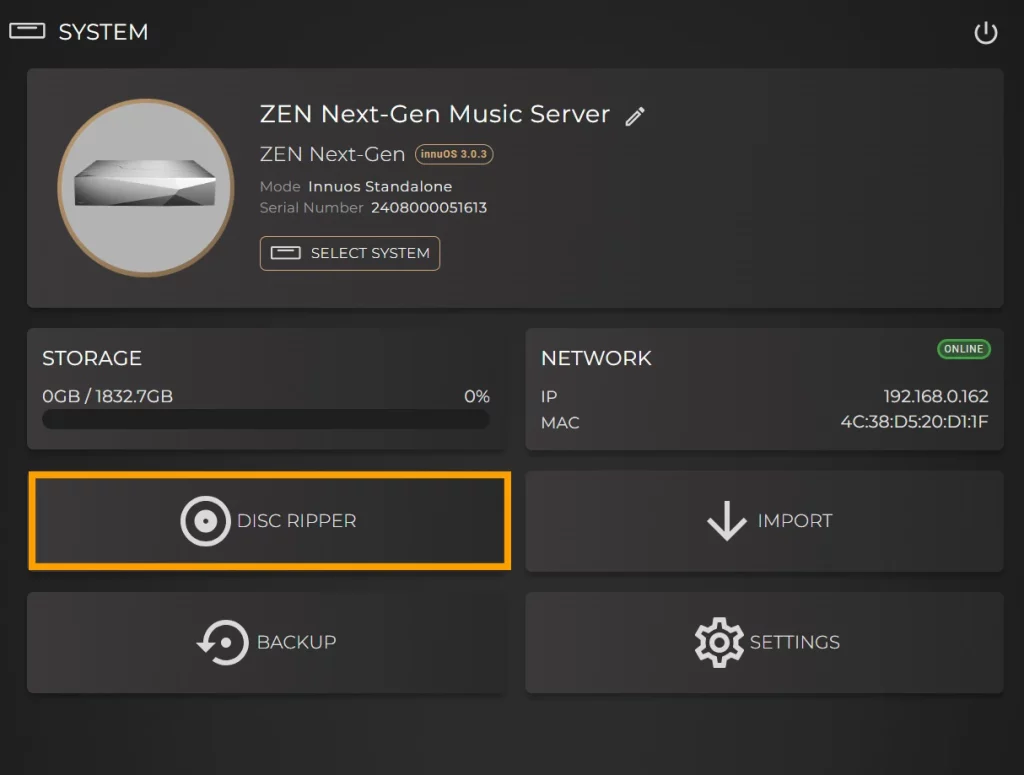
Step 2. Open the Innuos Sense app and go to SYSTEM -> DISC RIPPER
This will bring you to the main Disc Ripper page which will be temporarily set to Assisted Mode so that you can set up setup the optical drive.
Step 3. You will now need to make an initial configuration before you begin ripping CDs. Follow the supplied link to accuraterip.com and search for the model number of your USB optical drive to check its Correction Offset value.
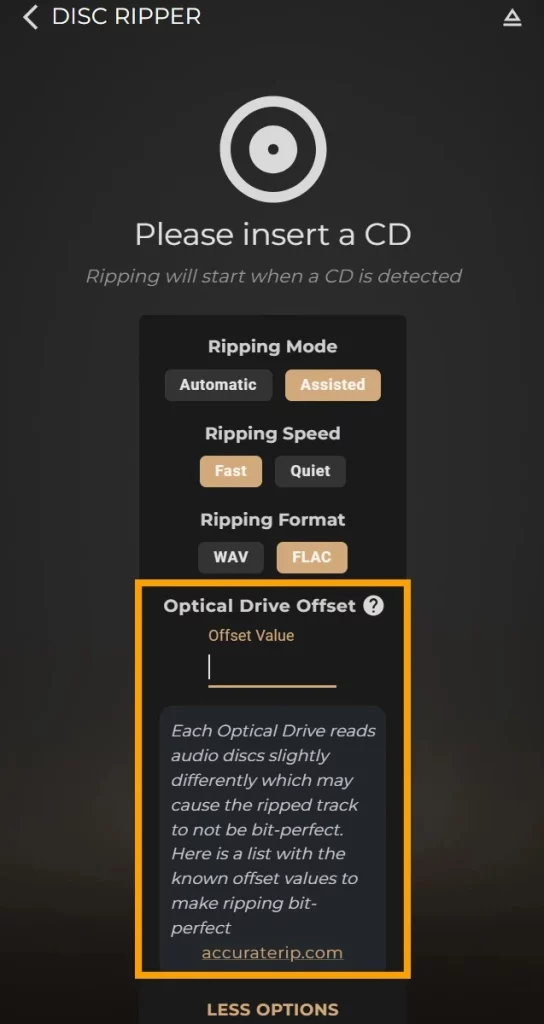
Step 4. Once you have confirmed this value, return to the Disc Ripper page in Sense and enter the Offset Value into to the text field. This is required to help ensure a bit-perfect rip.
Step 5. With the Offset Value entered, you may begin to insert CDs and rip them and can also set the Ripping Speed and Format if you wish. You can also switch the ripping mode back to Automatic if it is preferred.